Page 1 of 7

Whitey's stroker

Posted: Fri Feb 27, 2015 5:45 pm
by whitey
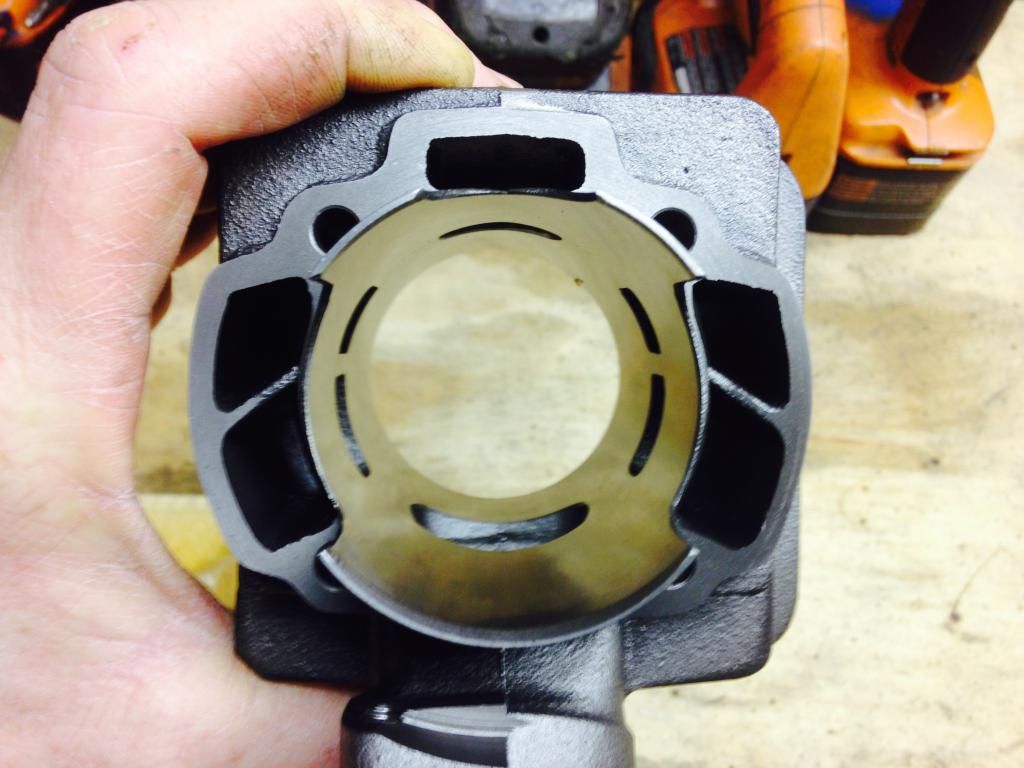
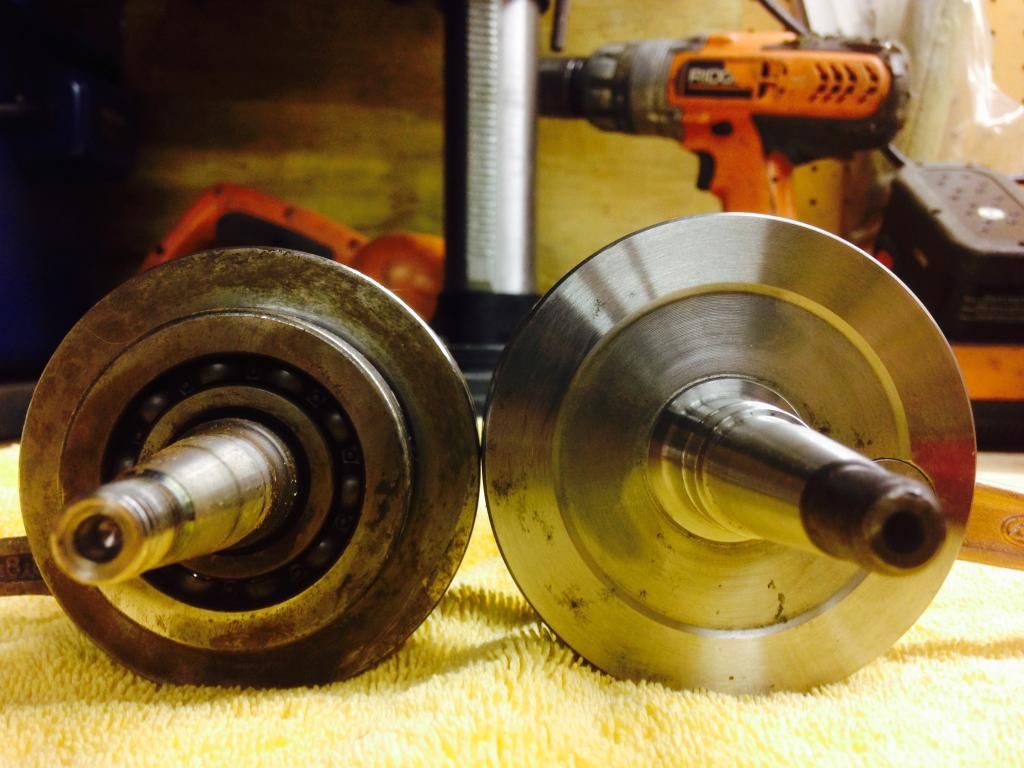
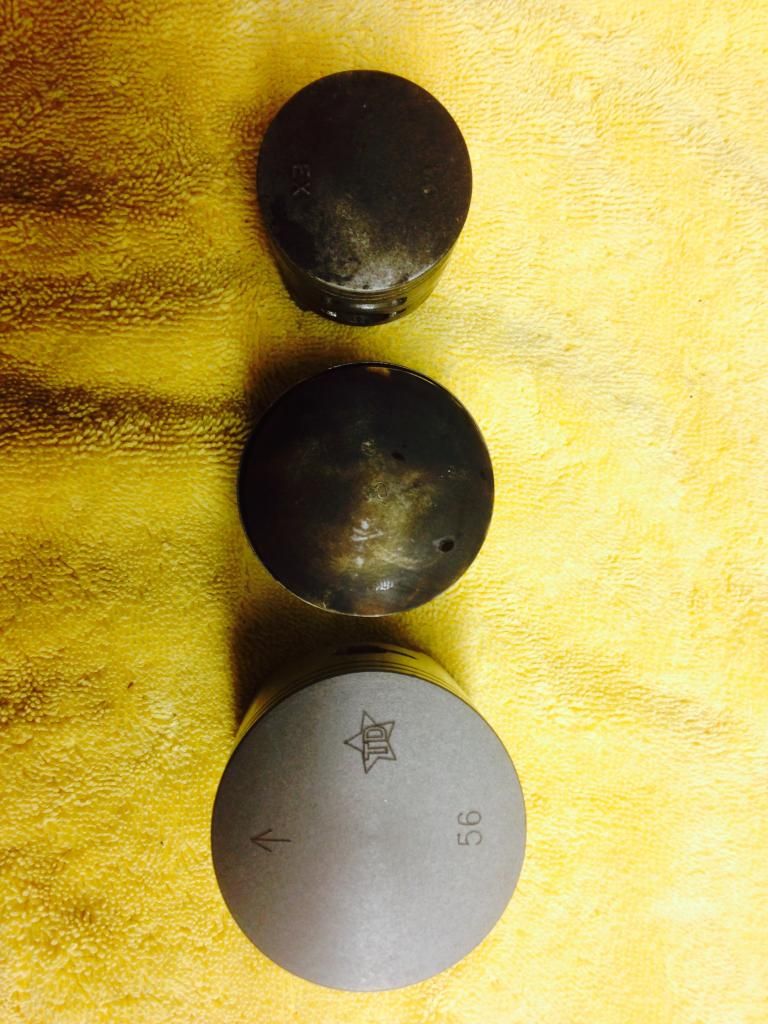
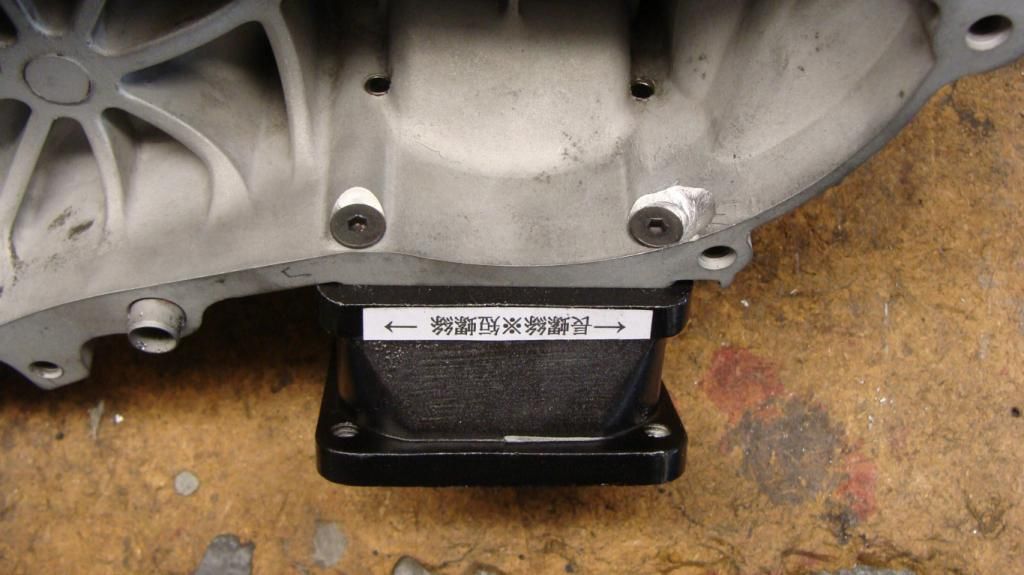
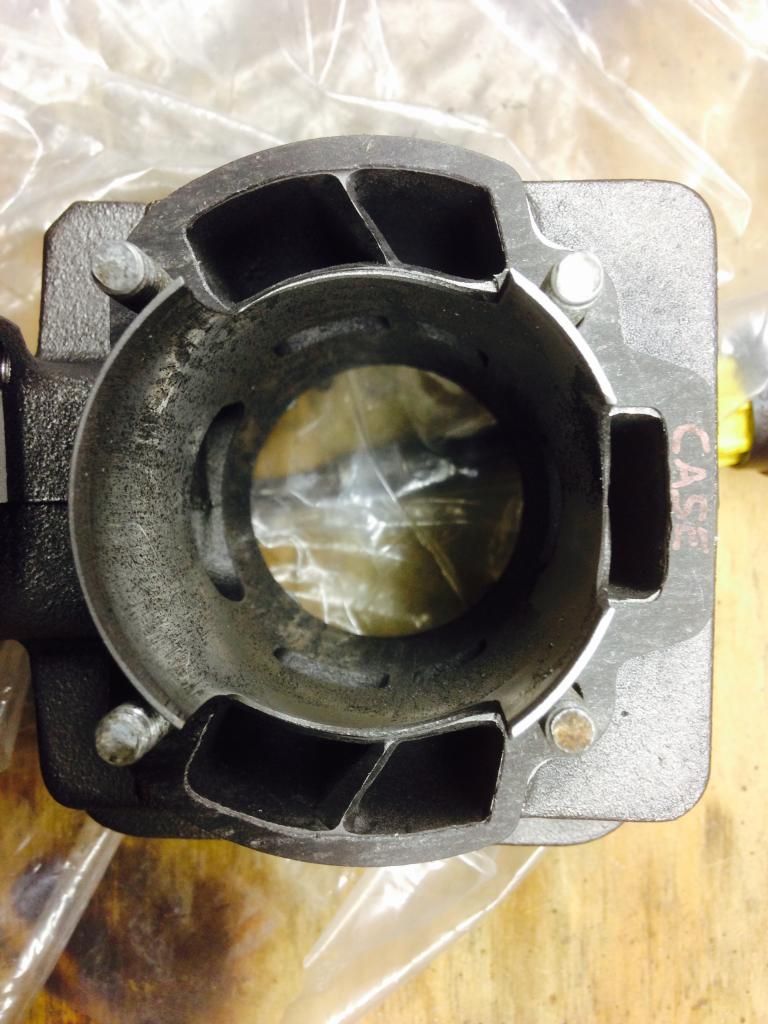
Here are some pics on of my 129cc stroker build. I bought this 01 Elite about a year ago. It is in very nice shape and is one of my favorite rides. I bolted a Malossi kit on it last summer matched with a PG long, 24 OKO clone, Keli var and springs. It was great, and was a favorite of some of my friends. I've been selling off those parts to fit the stroker parts.viewtopic.php?f=2&t=30665 I purchased most of my parts from Taida Motor part company. They have many other Dio/Elite performance parts including liquid cooled kits. I chose to go all in and buy the biggest kit and stroke available. From 50cc to 129cc, before I bought this Elite I didn't know that was possible. The cylinder is a 56mm cast bore and the crank is 52.6mm stroke. I have their 120-129cc pipe and the big black manifold from them also.
Image
Image
Image
Image

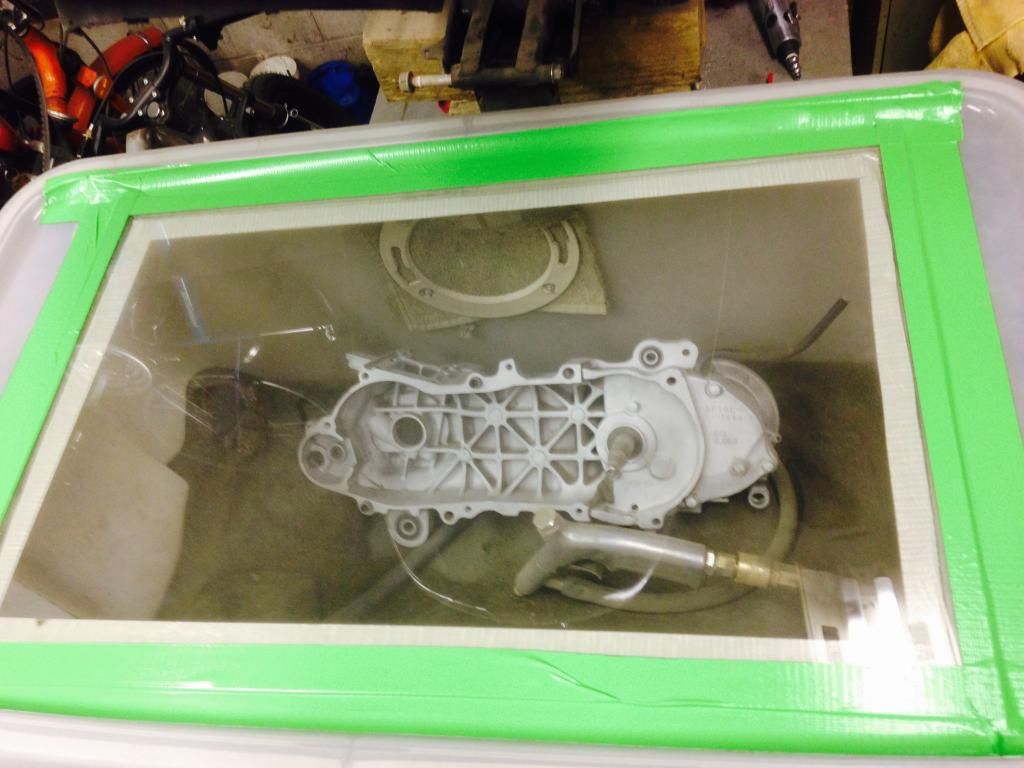
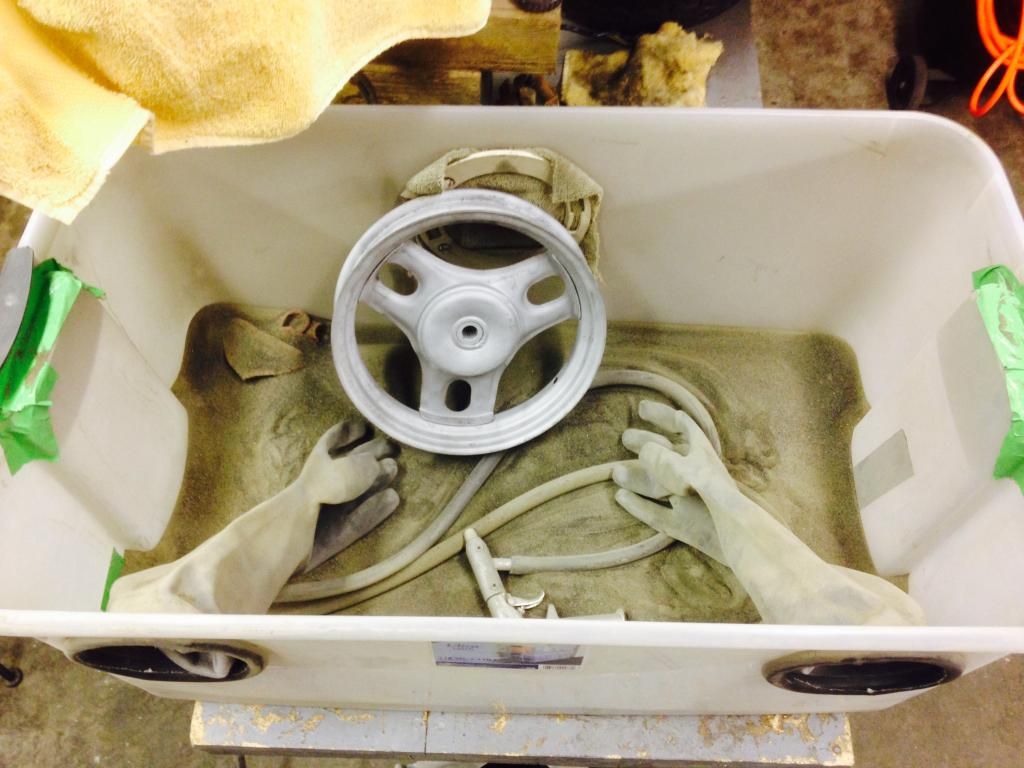
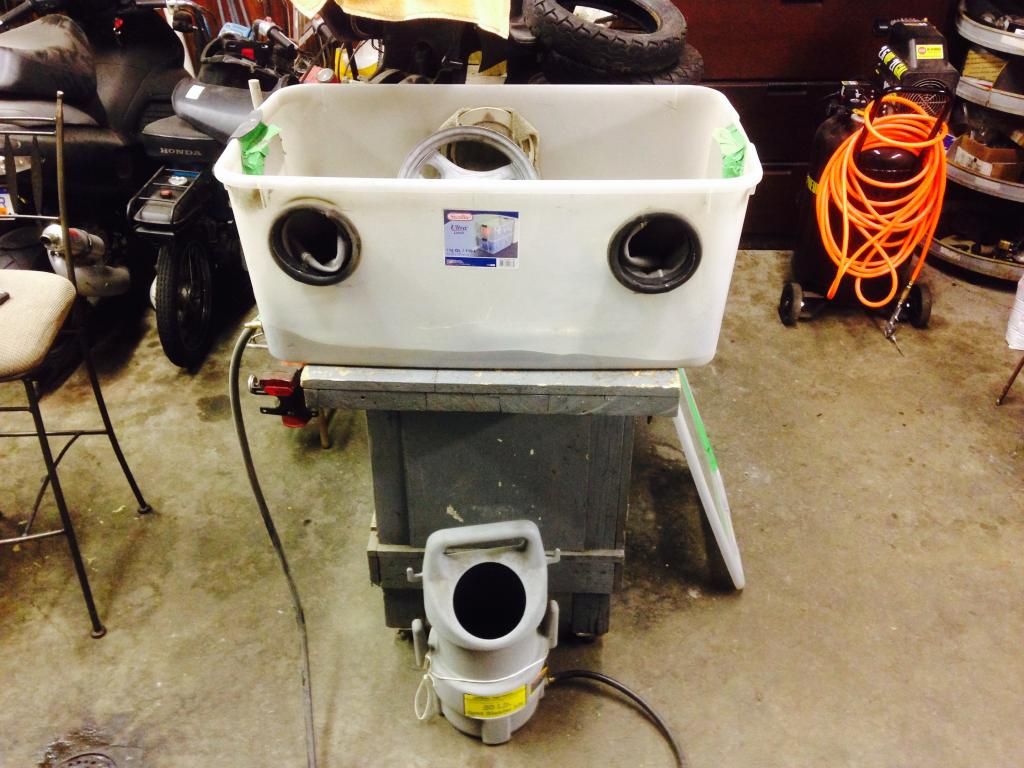
I strapped my bike down to my work bench to begin the work. Once I stripped the cases and bagged and tagged all the parts I put the cases in the blaster. My brother made this for our projects and it works great. It's so nice to do this in the heated garage instead of in the driveway.
Image
Image
Image
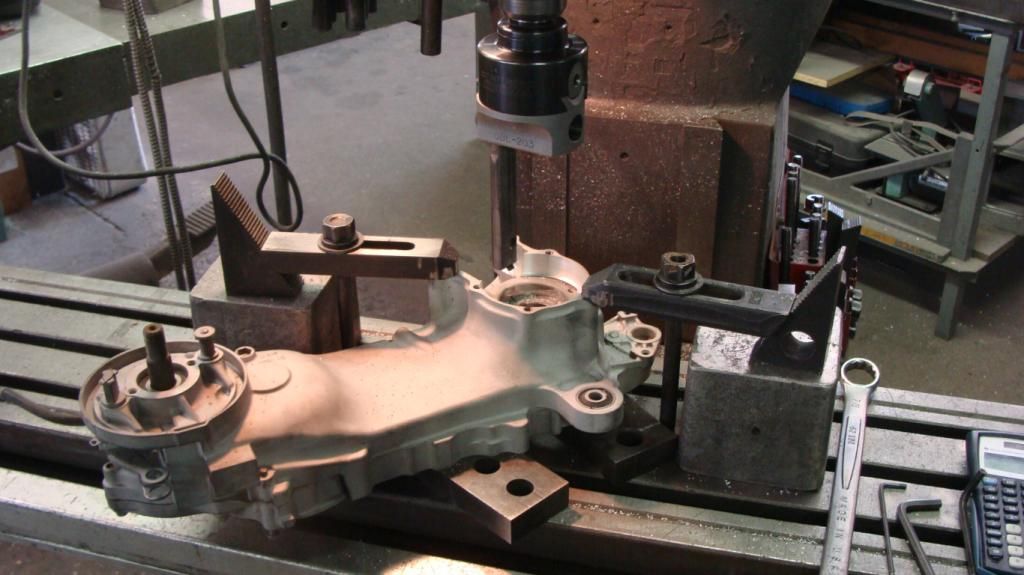
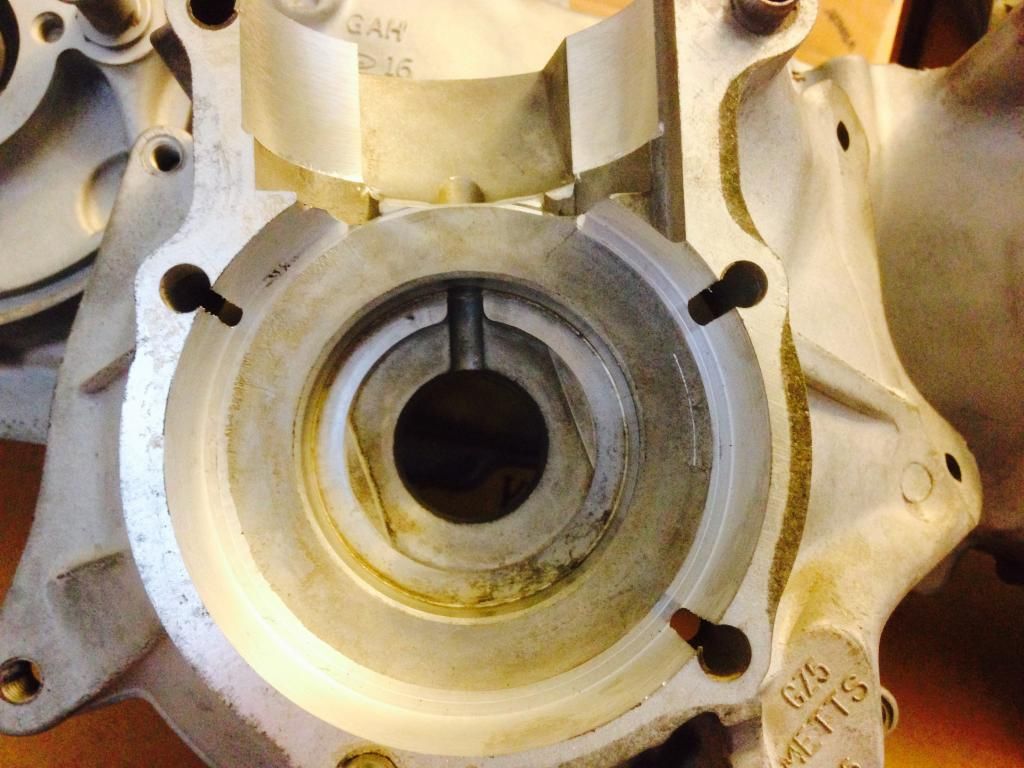
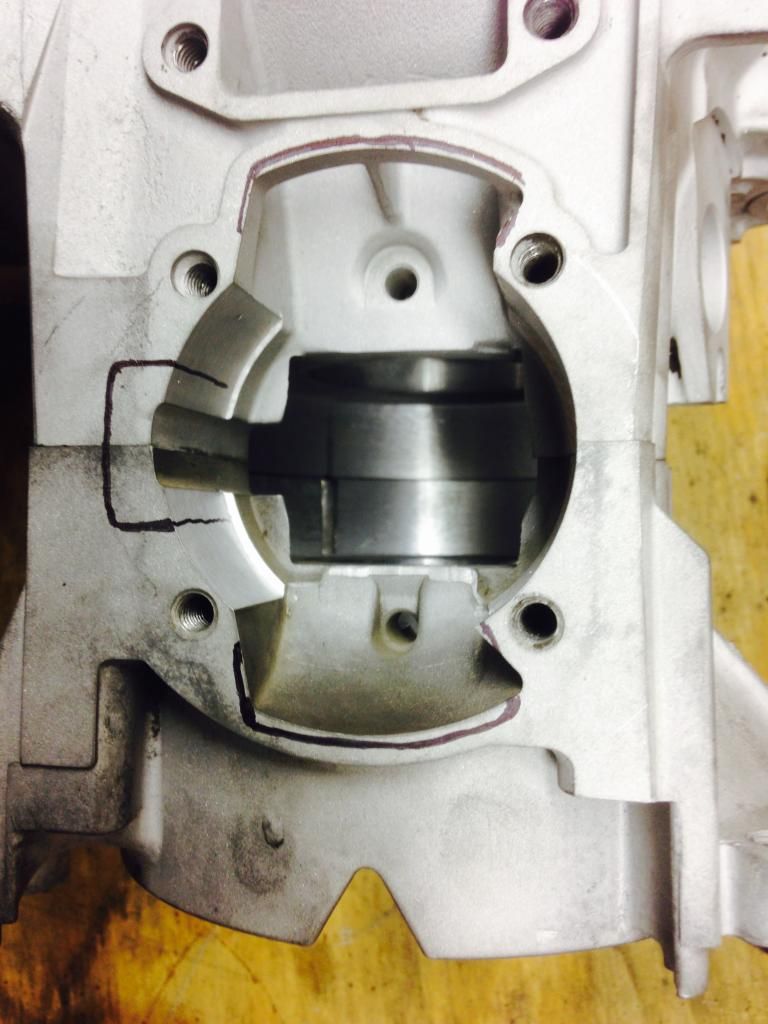
I have a friend do my machining and help with technical stuff. He is extremely skilled and knowledgeable, and is very percise with his work. Here is his current project. http://www.mopedarmy.com/forums/read.php?7,3775171 I just got my cases back from him after he machined them for the bigger cylinder skirt and larger crank.
Image
Image
Image
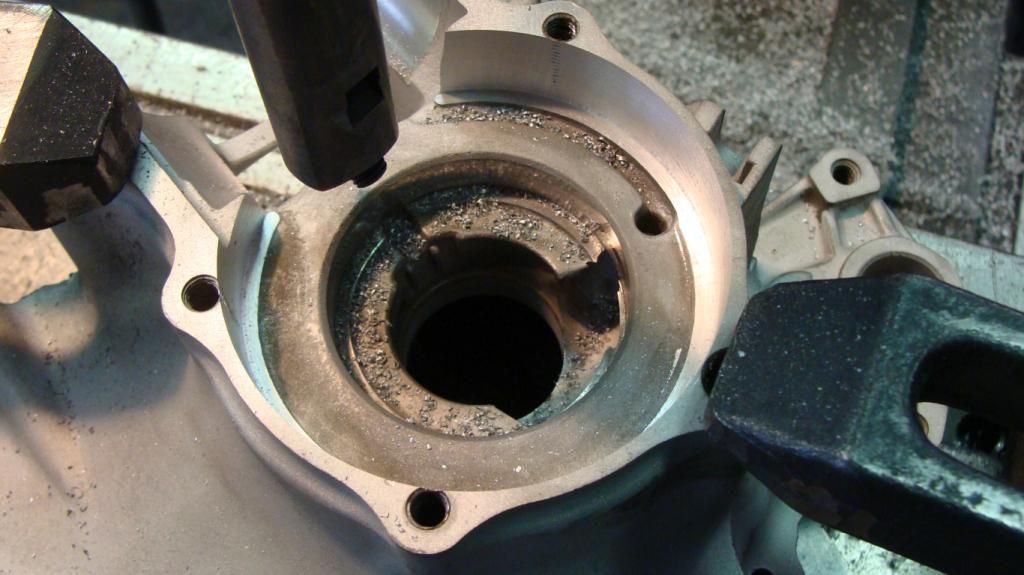
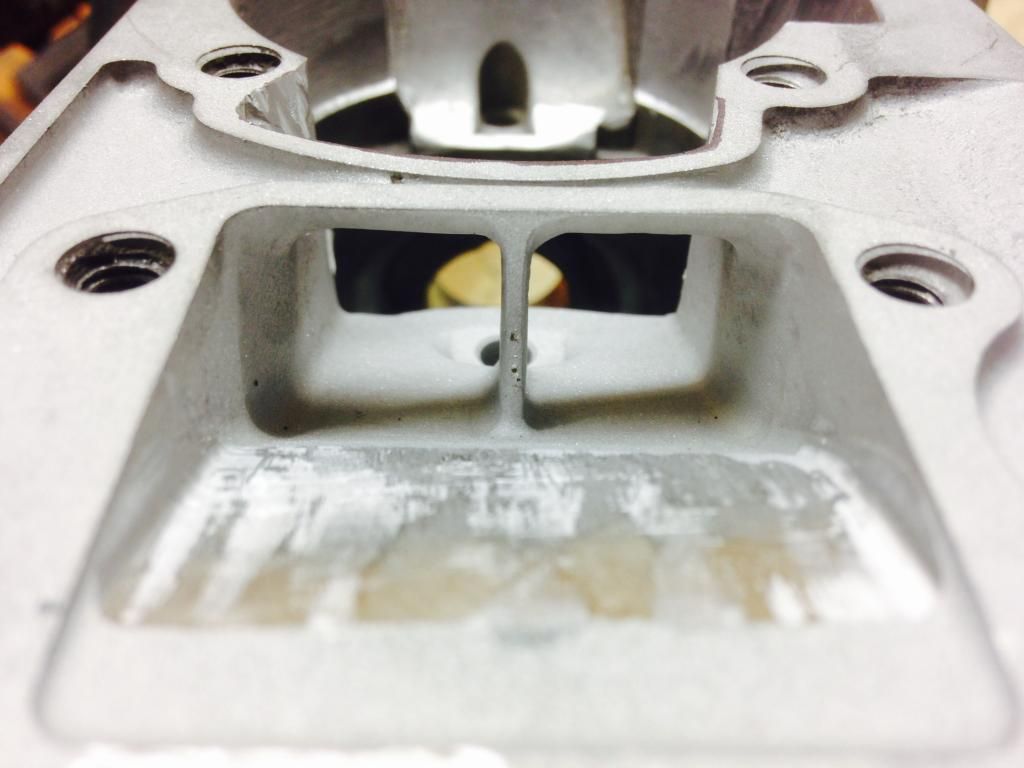
The crank is so much bigger that it causes you to machine into the holes for the case bolts. I will seal these bolt holes with copper washers and sealant. I have already ported the intake area and sand blasted the metal to give it a even finish.
Image
Image
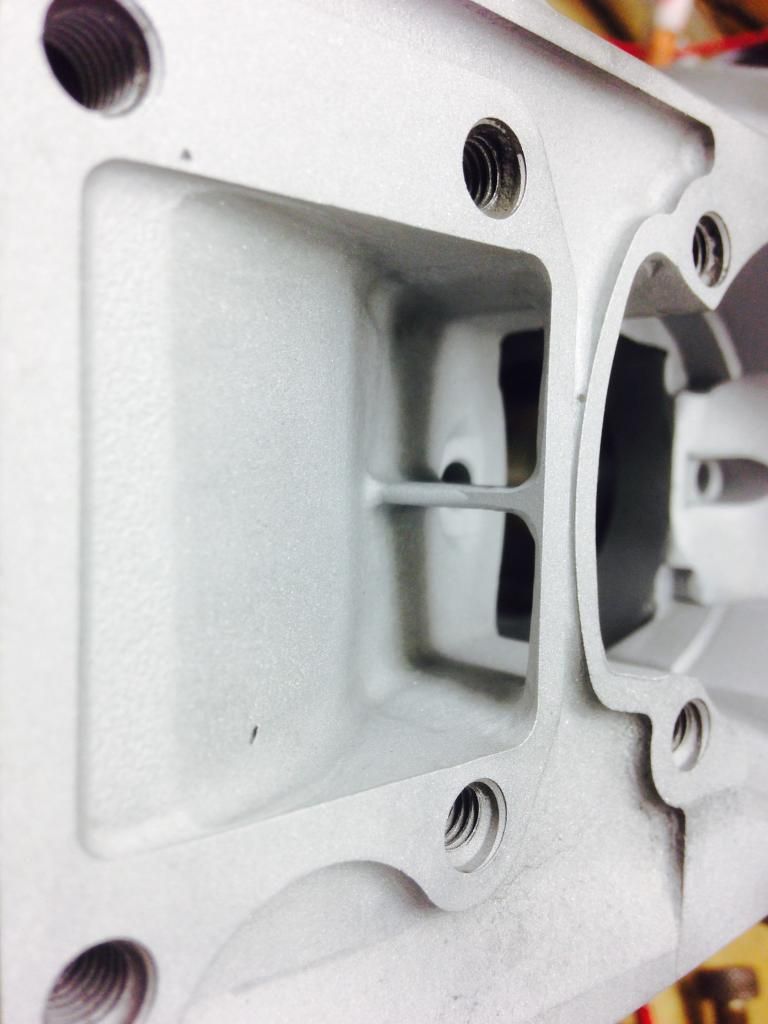
I still need to match the massive boost port. I took one of the base gaskets and laid it down on the cylinder to match it more closely. Then I will take that gasket and use it to trace the boost port on the cases. I cleaned up the transfers a little and knife edged the dividers.
Image
Image
Image
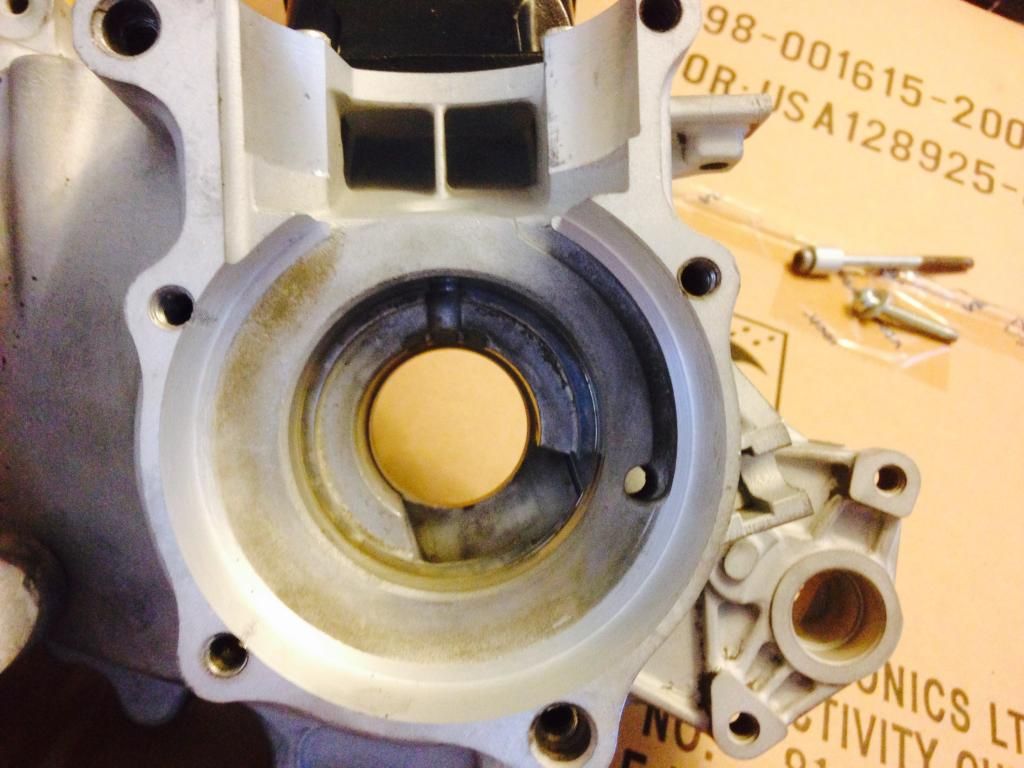
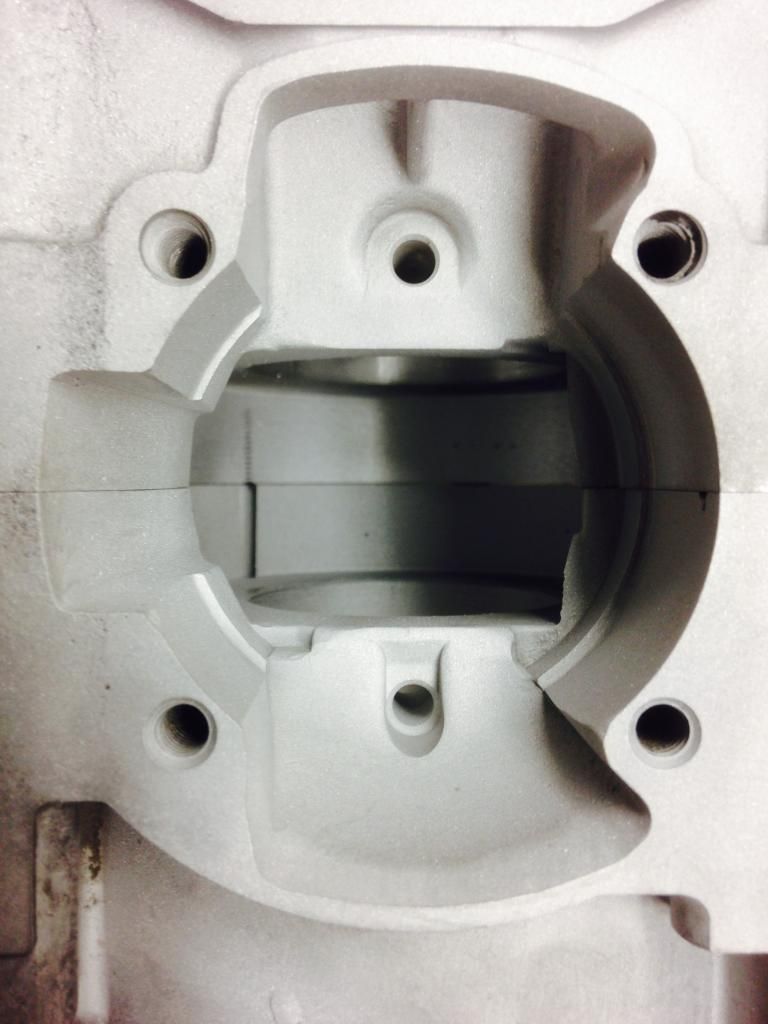
I did the case match and took the hump out of the intake. It still needs a little more work, then I will sand blast those areas to give it a nice finish.
Image
Image
Image
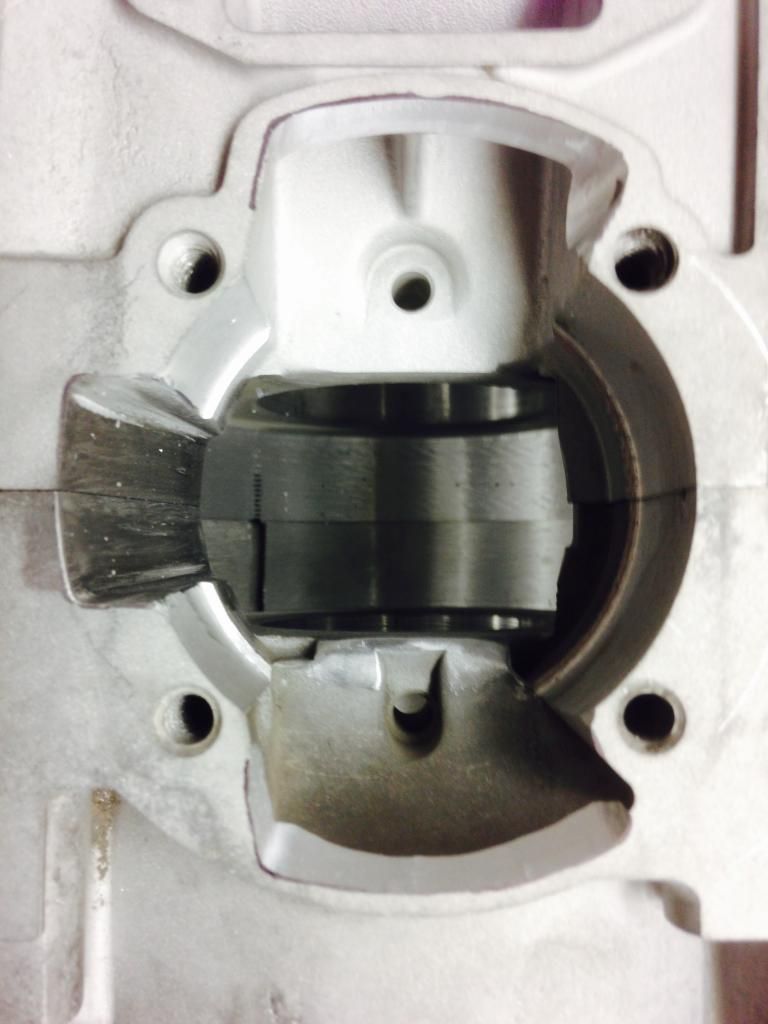
Finished all the dremel work and blasted all the surfaces. I matched the cylinder slightly where the cases were bigger then the cylinder. You can see some pits in the cases from air pockets in the castings. I might put some JBweld in there to fill it.
Image
Image
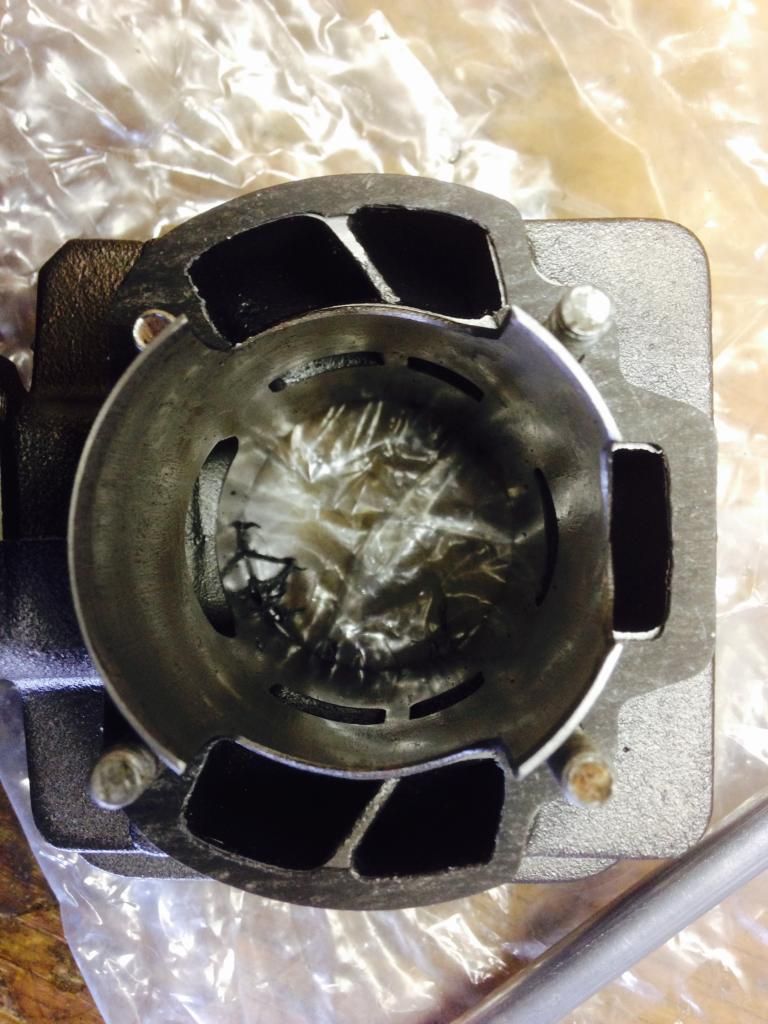
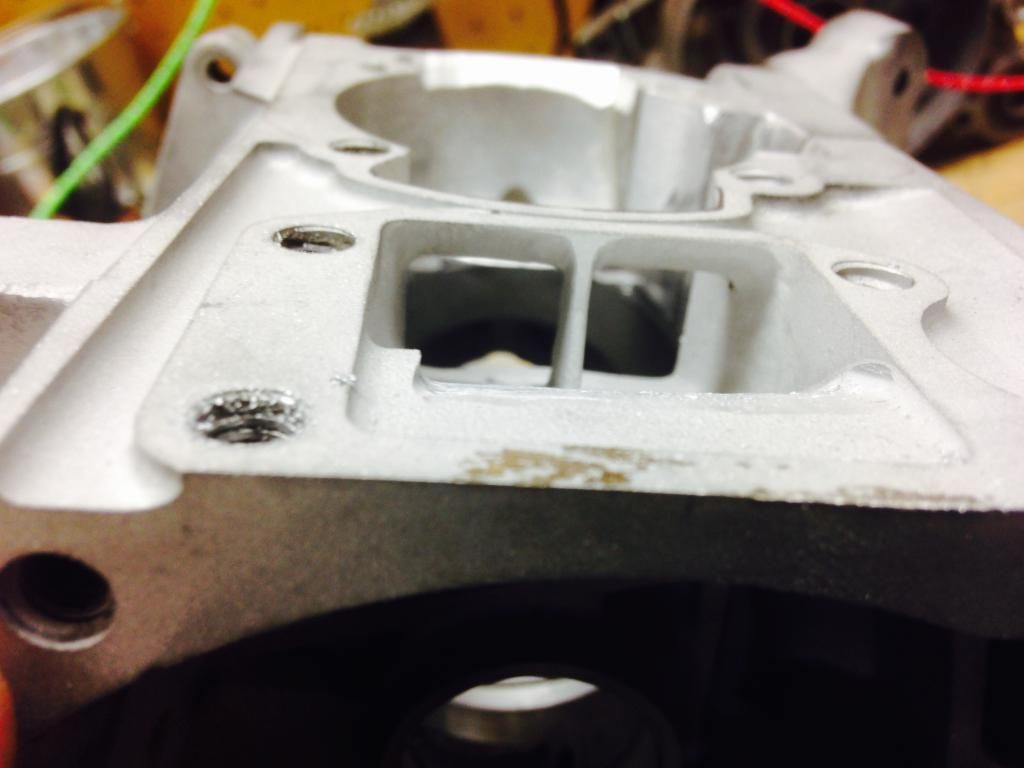
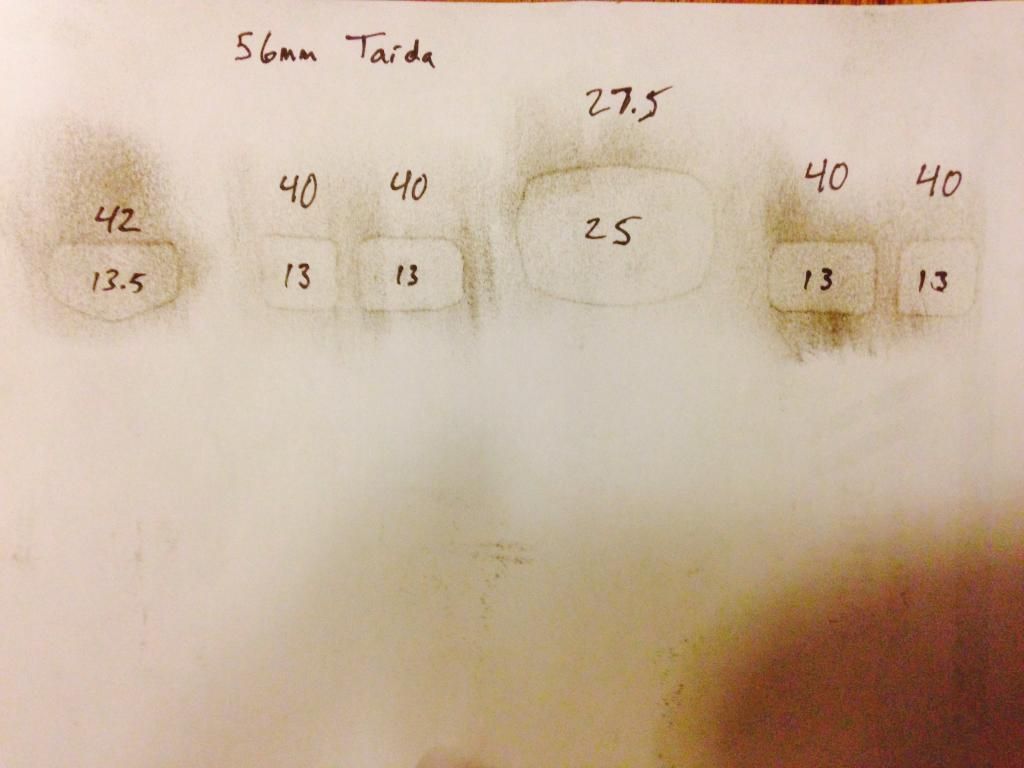
Here is the port map of the cylinder.
Image

Re: Whitey's stroker

Posted: Fri Feb 27, 2015 5:46 pm
by whitey
I took the bearings off my stock crank and dremeled them so they would easily slide on my crank and in my cases so I could test fit my larger crank. I definitely needed to remove more material on the exhaust side of the cases. I took out just enough to clear, thinking that the little wings left might direct the flow up into the transfers.
Image
Image
Image
I brought my Taida crank over to my friends shop to check the straightness of it. We placed it on V blocks and set a gauge on the variator end and the webs. The variator shaft was off true by .001" and the webs were off by .0025". I don't know if that is good or bad or not enough to even matter. I will measure my stock crank and my brand new Malossi crank (which is for sale viewtopic.php?f=2&t=30665) for comparison.
Image
Image
Used Permatex quick steel to plug off the oil pump hole. It is perfect for molding to fill that area as much as possible to help increase the primary compression.
Image
Image
The crank is in! Use heat and ice to make the install easy. It looks like my crank is not centered. I will run it as is but I hope it doesn't cause trouble. I used Hondabond HT (high temp) for my sealer. I will also use it and copper washers to seal my case bolt holes since the boring broke through into the bolt tunnels. I installed my seals before I put the crank in so that I could get them as close to the center as possible. I smeared some grease on the cases and the seals and they pressed into place smoothly.
Image
Image
Image
After receiving some advise I decided to center the crank. I used my home made crank puller tool viewtopic.php?f=1&t=30725 to yank the crank over till it looked centered.
Image
Image
So after installing the crank, piston and cylinder guess what happens? This is as far down as the piston will go before it stops. The piston is now hitting the remaining metal that I left that the crank was hitting. Now I'm going to have to pull the crank and seals and get the dremel back out. s*** f*** crap
Image
Image
I split the cases back apart to finish the work needed. While I had the dremel out I decided to do some more fine tuning. I looked through the intake passage and noticed that the cylinder skirt was blocking the flow. I reached through and scribed a line on the skirt to mark the material to be removed. I also rounded the edges of the cylinder skirt and chamfered all edges.
Image
Image
Image
Image
Image
Image

Re: Whitey's stroker

Posted: Fri Feb 27, 2015 5:47 pm
by whitey
Remember the case bolt holes that were opened up when machining the cases? I used copper washers and hondabond, with loctite to seal them. I also smeared hondabond where I could reach to fill in the gaps.
Image
Image
I reinstalled the rings how they were from factory. They are each marked differently right on the top of the ring with a thin spring that goes under the bottom ring to help.
Image
Image
After installing the cylinder and intake I sealed off the exhaust port and checked for air leaks. I sprayed soapy water all around the cylinder and intake and also around the seals and case bolts. I sprayed around where the case halves join and the oil pump hole that I epoxied. I only found one small one at the base gasket by one of the studs. I took the cylinder off and put a light coat of hondabond on both sides of the gasket and reinstalled. That fixed the only leak!
Image
Image
Here is the massive bolt that came with the pipe to attach to the mounting bracket.
Image
The pipe is mounted! I still need to dremel the mounting bracket a little to get all three bolts attached. I also had to modify the fan shroud to fit the pipe and larger cylinder. On the bottom of the shroud the pipe was pressing against it. I took off the shroud and turned it upside down. Then I took my torch and slowly heated the plastic till it started drooping and moving away from where the pipe would be. That still made for a tight fit but better than melting all over the pipe and burning a hole through where that precious cooling air could escape. Since this stroker cylinder is taller than stock it did not fit under the shroud. It is about an inch taller than stock. I cut the shroud around the top edge on the fan side shroud. I did not cut the other side. I installed the two parts and set the piece I cut off over the spark plug. Then I temporarily taped the gaps with some extra wide electrical tape.
Image
Image
Image
I should have taken the time to properly mount the pipe, but I was in a hurry to ride the thing. Yesterday on the way over to DirtyE's I lost the rear mounting bolt which left the pipe hanging from just the two on the cylinder. I heard a vibration on the last couple blocks to his house and when I got there and checked to see what's wrong I saw the blog missing and the pipe would wiggle. Well, the header snapped 3/4 around and a small chunk was missing. When I removed the pipe I found the chunk in the pipe which was a relief. So I took the time to mount the pipe better and weld the crack.
Image
Image
Image
I pressed some 8.44 gears onto the output shaft of a spare engine that I have. When I removed the trans cover and switched the parts I noticed the covers were different. My 01' has one bearing in the cover and the other spare one has two. The shafts are not identical. The cover must be installed with the appropriate shaft. I would think that the two bearing would be better. I was missing any washers that may have been in my spare engine so I did not have one to put on the end of the shaft as it goes into the bearing. I found one from a Puch engine I had that was the same ID as the shaft and 1mm thick like the other washer on the other bearing. I hope it is installed correctly. After tightening the trans cover everything spins smoothly so it should be good.
Image

Re: Whitey's stroker

Posted: Fri Feb 27, 2015 7:09 pm
by TinyElvis
Very nice! Love that pipe! Taida pipe? Nooice

Re: Whitey's stroker

Posted: Sat Feb 28, 2015 3:23 pm
by ped
Very Nice work whitey. :thumbwink:

Re: Whitey's stroker

Posted: Sun Mar 01, 2015 8:18 pm
by DirtyE
Using the port calculator I sent you, you will be able to enter the numbers and get your timings. From a glance, you'll be able to widen that exhaust port substantially to give you more power across your powerband.
I think with the overwhelming size here (omg its so big she said), we dont need to focus on being pipey at all but can go for a blowdown in the low to mid 30's. Minimal transfer port work preferably due to maintaining manufacturer angles on the roofs. I think this could surely take your Gilera out on track day.

Edit: 68% of the bore is the target for a oval port I believe. It should be documented in the bigbnrg blog.

Re: Whitey's stroker

Posted: Mon Mar 02, 2015 1:45 pm
by ped
Hi Whitey. I'm a follower. :nerd:
that setup is going to have insane power. :surprise:
the pipe looks awesome. :thumbwink:

Re: Whitey's stroker

Posted: Mon Mar 02, 2015 8:13 pm
by NZHonda
That looks great Whitey but can I just ask about the sandblasting of the case halves.

From what I have heard and read it is not advised to blast the cases. The casting is porous and absorbs the glass or sand bead. When the cases heat up and expand the absorbed bead is released into your cases and would then turn your fuel mixture into some sort of valve grinding paste destroying your engine.

A friend of mine beaded his cast alloy rocker cover, he cleaned it thoroughly but it still turned his engine oil into sludge and blocked his oil pump.

I am happy to be corrected on this though as I would love to tidy up some of cases!

Re: Whitey's stroker

Posted: Mon Mar 02, 2015 11:18 pm
by whitey
I use the black beauty type stuff from Harbor Freight. It works great, is cheap and is black, so if it is on the aluminum it's shows. I wipe everything down and blow air over the parts to flush out the dust. I hope I'm not leaving micro particles that will hurt my motor. Some parts I wash in the sink with soapy water and air dry. I like to use the sand blaster when I can cause it makes cleaning the nasty old parts easy. I have used soda before on parts I didn't want etched by the sand but that was before the blasting cabinet and the soda is so salty it wasn't pleasant. I don't see there being enough grit accumulated to plug anything but I suppose there is a chance of harmful dust. If anyone else has heard or experienced this negative effect please chime in.

I used Big B NRG's porting calculator http://bigbnrg.blogspot.com/2011/05/por ... r.html?m=1 on the measurements I took from the cylinder. I used his method to measure the ports using a piston ring sitting on top of the piston and I used a flashlight to show exactly when the ports open/close. I was actually pretty close to my port map posted earlier where I just rubbed my dirty finger over the ports onto a thin piece of paper, then using the calipers to measure from the lines to the top of the paper. Big B NRG's program tells me this cylinder has an exhaust timing of 194* and transfer timings of 29*. After reading his blog it tells me this cylinder is going to be a very hard hitting pipey beast. I will probably want to try and tone this down a little because these readings are almost of the charts on the racing end.

Re: Whitey's stroker

Posted: Tue Mar 03, 2015 3:08 am
by kauaianman
need to cut front ear off inside case if not conrod will hit in the front :)

nice parts and build

Re: Whitey's stroker

Posted: Tue Mar 03, 2015 8:44 am
by whitey
I was going to check for that. Especially since this is a stroker, the big end is so much further out from center than stock. I was going to take my old bearings and grind them down so they will easily slide onto the crank and into the cases to test fit my parts. I've heard that happens to some engines and crank combos. I just need a bearing pulled to get my stock bearings off the old crank. I have a friend in town that has one I'll borrow.

Re: Whitey's stroker

Posted: Tue Mar 03, 2015 9:51 pm
by S4Patrick
Nice work thus far. Keep up the fantastic work.

Re: Whitey's stroker

Posted: Fri Mar 06, 2015 12:16 am
by deuce217
Looks really nice! Nice to have a friend with those abilities and tools too

Re: Whitey's stroker

Posted: Fri Mar 06, 2015 12:25 am
by whitey
I couldn't do it with out him. A dremel with a flex shaft is great but some things need to be left to the pros.

Re: Whitey's stroker

Posted: Fri Mar 06, 2015 2:14 am
by ped
hi whitey. within .002'' your fine. :nerd: